Showing posts with label baking. Show all posts

Tuesday, September 13, 2011

Tuxedo Brownie Squares

I've been out of blogging for so long that I almost forgot to document this!!  Scary! :)  We had to take a dessert to our life group.  This is a Pampered Chef recipe that I've made in the past.  It's sooo yummy, so I decided to go for it.  This recipe comes out of the Stoneware Sensations cookbook.

What you'll need:
1 package of brownie mix
1/2 cup seedless raspberry jam
2 cups fresh raspberries, divided
3 squares (1 ounce each) white chocolate, melted and cooled slightly
2 packages (8 oz each) cream cheese, softened
1/2 cup powdered sugar
1/4 cup milk
1 container (8 ounces) frozen whipped topping, thawed
chocolate curls, optional

1. Preheat oven to 350*
2. Lightly spray 9 x 13 pan and prepare brownies according to the package directions.
3. Cool completely
4. Spread jam onto brownies.  Note-I had a hard time finding the jam this time.  I ended up having to buy some fancy brand. :/
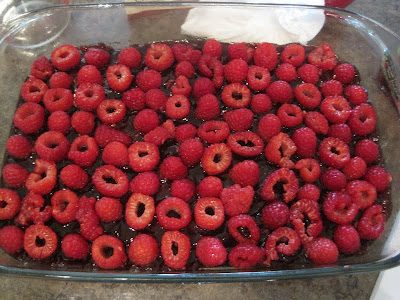
5. Reserve some raspberries for garnish (I didn't do this).  Arrange remaining raspberries evenly over jam.
For whatever reason, my store only had GIANT raspberries.  I actually cut them in half.
6. In micro-cooker, microwave chocolate on HIGH 1 minute, stir.  Microwave an additional 30 seconds until chocolate is completely melted when stirred.  Cool slightly.
7. Meanwhile, combine cream cheese and powdered sugar. Mix well.
8. Gradually whisk in melted chocolate and milk.
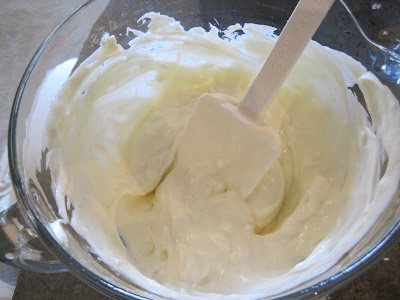
9. Fold in whipped topping; spread carefully over raspberries.
10. Refrigerate 1 hour or until firm.
Garnish with the reserved raspberries and chocolate curls, if desired.
Store, covered, in the refrigerator.

I didn't get a picture of a cut piece since it was devoured at life group.  However, I did get a side view while it was still in the pan.

It was a HUGE hit.  Everyone raved about it, and a handful of people had multiple pieces.
Michael, on the other hand, is not a fan.  Mostly because he doesn't like raspberries.  You may want to keep that in mind.  I knew it was risky to take for that very reason.  Raspberries aren't as well loved as other fruit.  It ended up being a win though. (Thank goodness)

Thursday, October 7, 2010

Apple Crisp

Sick of apples yet?  I promise this is the last apple recipe for you!

This is actually a recipe I've been making for a while.  I made it the for the first time soon after I moved to Columbus.  I had some friends over for dinner, and apple crisp seemed like the perfect fall dessert.

The recipe comes from this cookbook
Notice it says "Bridal Edition"... this was one of my college graduation gifts from my mom.
No, I was not married at the time.  No, I was not engaged either.  I wasn't even dating anyone.  Oh c'mon.  That's funny.  That's my mom for you.  You just have to laugh.

The cookbook is a good one though.  It has lots of helpful information in it, besides the good recipes.

Here's what you'll need:
4 medium tart cooking apples (Rome, Granny Smith...)
3/4 cup packed brown sugar
1/2 cup all-purpose flour
1/2 cup quick-cooking or old-fashioned oats
1/3 cup butter, softened
3/4 tsp ground cinnamon
3/4 tsp ground nutmeg

What you do:
Heat the oven to 375.  Grease the bottom and sides of a square pan, 8x8x2 in, with some shortening.
(I didn't use a square pan, but rather an oval one, and I just sprayed it with Pam)

Peel and cut apples
I used 5 apples, because mine were pretty small.
Also, I used the Pampered Chef apple slicer-this cuts the apples into 10 pieces, and then I cut each piece in half again.  (For the pie I did the same thing, but cut each slice into thirds.)

Spread apples in the pan
Using this pan does make the apples a little thinner of a layer, but it still works out alright.
I like using this dish, because then I can just throw the lid on the leftovers and put it in the fridge.

Mix brown sugar, flour, oats, cinnamon and nutmeg

Add in butter

Sprinkle over apples

Bake about 30 minutes or until topping is golden brown and apples are tender when pierced with a fork.

Serve warm with whip cream or ice cream
Yum!

Monday, October 4, 2010

Apple Pie

As you know, I have lots of apples to use up.  It was time to make an apple pie!  I don't think you can pick apples and not make an apple pie.  How un-American, right? :)  So an apple pie I made.

Ok, actually I made two.  One at work with Little Man's apples and one at home for my deary husband.  I actually made this pie for the very first time two years ago.  Little Man and I had picked apples, and I thought it was fun to make them a pie.  I had never made a pie before.  At least not a fruit pie, and definitely not a homemade crust.  I had no pie experience.  I was never taught by my mom, and the only other person who I use as a cooking reference (my sister) refuses to make pies because her crusts don't turn out.  I figured it was worth a try though, so that's what I did.  My boss said it was the best apple pie she had ever had, so I took that as a great success.

To date, I have still only made three pies.  That first one two years ago, and then the two from this week.  I think the recipe is a definite keeper though.  I found it on all recipes and it's listed under "Perfect Apple Pie".
What you need:

CRUST
2 cups all-purpose flour
1 tsp salt
3/4 cup shortening
 4 T cold water (or more!)

FILLING
7 cups thinly sliced, peeled baking apples
2 T lemon juice
1 cup sugar
1/4 cup all-purpose flour
1 t ground cinnamon
1/4 t ground nutmeg
2 T butter or margarine
1 egg yolk
1 T water

In a bowl, combine flour and salt; cut in shortening.
Gradually add cold water, 1 tablespoon at a time, tossing lightly with a fork until dough forms a ball.
NOTE: I used between 7 and 8 tablespoons each time, instead of the four called for.  Luckily I had read the reviews before hand and someone else had stated this, so when mine wasn't working with the four tablespoons I didn't worry so much to add more.

Also, you don't want to over mix the dough.  This will result in a non flaky crust.
Chill for 30 minutes.
Some people did say they just use store bought crust.  Obviously you could do this.  I just liked the sense of accomplishment that I made the entire thing on my own--no short cuts! :)

While that was chilling, I worked on getting the filling ready.
I was actually so preoccupied during this that I forgot to take pictures, but here is what you do.

Peel the apples and then slice thinly.  I have found that generally a normal/medium size apple turns into about a cup when cut.  That said you will need about 7 apples to get the 7 cups called for.  I used about 8 since some of mine were small.

Throw the apples into a large bowl.  Then toss with lemon juice.  Combine sugar, flour, cinnamon and nutmeg.  Add to apples and toss.

Take half of the dough and roll into a 10 inch circle.  Place in 9 inch pie plate.

Pour apples in

Dot with butter

Roll out remaining pastry and fit to top of pie.
The directions say to cut slits into the top, but instead of slits I cut small leaves out!

Place over the filling and seal and flute the edges.  Umm... "flute"?  Yeah, my edges aren't that great, but please give me a break.  This is only my third pie! :)

Beat egg yolk and water, brush over pastry.

Bake at 425 for 15 minutes.  Reduce heat to 350 and bake for 40 to 45 minutes or until crust is golden and the filling is bubbly.
I recommend putting a cookie sheet on the shelf underneath in case it leaks.


I'm not much of a pie person.  Oddly, I don't like crust.  I rarely eat pie that has crust on the top and bottom.  It's just too much work! :)  But this pie is gooood.  The crust was even flaky!  YEAH!
Michael approves.

6 caramel apples + 8 apples for pie = 14 apples down, lots more to go!

Thursday, July 8, 2010

Jello Poke Cake

I'm not really a cake person, but there is a cake I just can't resist.  It's called Jello Poke Cake.  I had never heard of it, or tasted it until college.  Rarely did I take desserts from the dessert buffet.  I'm not a huge sweets person and most of the desserts involved chocolate.  No thanks.  There were 3 desserts that I would get from the beloved caf--jello poke cake, lemon bars, and pumpkin bars.  Yum.

Not so long ago I was on a site looking at recipe reviews and came across my beloved cake.  I had no idea it was so basic and easy!

Here's what you'll need.
 The recipe actually calls for plain white cake, but I like to use the french vanilla one.  It's white and adds extra flavor.  Also, the recipe said not to use sugar free jello.  I have no idea why.  I can't imagine it would change things all that much, but I'm too chicken to try! :)

 Make the cake as instructed on the box.

Let the cake cool completely

Then poke holes in it.  I use a serving "fork" so that the holes are big and spread out.

  Make the jello as directed.

Then pour into holes.

Make sure to cover every hole.  You will have plenty of jello.

The entire cake will be pink

Including the bottom and sides

Let cool for a bit (an hour or two) and "frost" with cool whip

and serve!  SO GOOD!
This is a good cake to make with the kiddos as well.  I've made this with Little Man before.  Besides just the fun of cracking eggs, pouring liquids and mixing the batter, he really liked poking holes in the cake!

Saturday, July 3, 2010

A little red, white, and blue fun

We are going to a bonfire with friends and were told to bring some food to share.  I am bringing a couple of "cookout" type things, but I wanted something to be a little patriotic.  There are TONS of red, white and blue food creations floating around out there on the internet.  I saw this idea a few places, so I'm not sure who the originator is.  It looked fun and easy, so I figured "What the heck, I'll give it a try."

 Here's what I used
Strawberries, white chocolate, and blue sprinkles

First, I washed the strawberries.  I wasn't sure how far my supplies were going to go, so I just washed a few to begin with.  I ended up having to wash more.

Then I put the bag of chocolate chips in a measuring cup, poured just a tad bit of vegetable oil in them, and started melting them in the microwave.  

You have to be careful not to burn chocolate when melting it.  I did one minute to start, stirred some, and did about twenty more seconds.  It was perfect.

Then I put some blue sprinkles in a measuring cup.  My idea was to put it in something small to help contain them since I didn't have a huge bottle.  Unfortunately, this wasn't the best idea when it came to the big strawberries.  Oh well...live and learn!

So first dip the strawberries into the chocolate, leaving a little red at the top.

Then let the excess chocolate drip off.  
(If you don't, it will lump up when put in the sparkles.  Trust me on this one!)

Then dip the tip in the blue sprinkles

And you have fabulous red, white, and blue strawberries!!
Pretty darn cute huh?  I'll let you know how the crowd liked them....

Tuesday, May 25, 2010

Carrot Cake

Once again I am sharing one of my very yummy, high compliment, quality recipes.  You know... like my banana bread recipe.... the ones where I really want to keep for myself and get all the glory.  But, being the oh-so-kind soul that I am, I'll share.

K's birthday is coming up this next week.  They are going to be on vacation, so I made her a cake a week early.  Carrot cake is her favorite, so that's what I made.  I made it for her last year too.  It's so yummy!

So here's what you'll need.  It's quite a lot.  "$200 worth of ingredients" if you ask Michael.
 
3 eggs
2 cups flour
3/4 cup buttermilk
2 tsp baking soda
3/4 cup veg. oil
2 c shredded carrots
1 1/2 cup sugar
1 cup flaked coconut
2 tsp vanilla extract
1 cup chopped walnuts
2 tsp ground cinnamon
1 can (8 oz) crushed pineapple, in juice
1/4 tsp salt
1 cup raisins
frosting!

Ok, so it is a lot of stuff.  I agree.  But a lot of it you have on hand anyway.  Plus, I personally keep out the raisins.  I like raisins.  Just not in my carrot cake.

First, you have to preheat the oven to 350*.  I think this was suppose to be made in a 9 by 13 pan, but I decided I wanted to make it in 2 nine inch circle pans and make a layer.  I made this for the first time for Easter three years ago.  I've made it many times since.  It's a keeper in my book.  I got it off a cooking website, but have no idea which one.  Sorry!

First, sift the flour, baking soda, salt, and cinnamon in a bowl.  Set bowl aside.
So just to clear it up-- I do no "sifting".  I dump it all in a bowl and mix it around.  Sift away if you must.

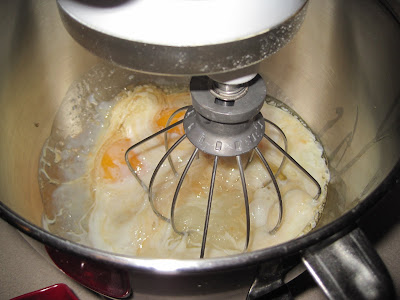
Combine eggs, buttermilk, oil, sugar, and vanilla.  Mix well.

Add flour and mix

it will start to look like a yummy spice cake

combine carrots, coconut, walnuts, pineapple (and raisins if you choose to use them)

You'll notice from the first picture that I bought a regular bag of carrots.  I've bought the already shredded ones before, and they do work out ok.  Only this time my store only had matchstick ones that were pretty thick.  Instead I (ok, Michael) used my Pampered Chef cheese shredder thing and shredded them myself.

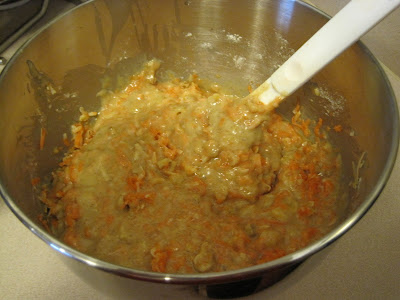
Using a large wooden spoon or spatula, add carrot mix to batter and fold in well.

Pour into greased pan(s)

check out that yummy goodness!

Cook 1 hour for big cake or 45 minutes for two 9 inch cakes
Check with a toothpick

Cool 20 minutes

FROST!
I like to put a layer of frosting in between the layers of cake.  It does make it a little trickier to frost the rest though, because it slides a little.
It would probably be better with homemade cream cheese frosting, but at this point I just use store bought.  Maybe someday...